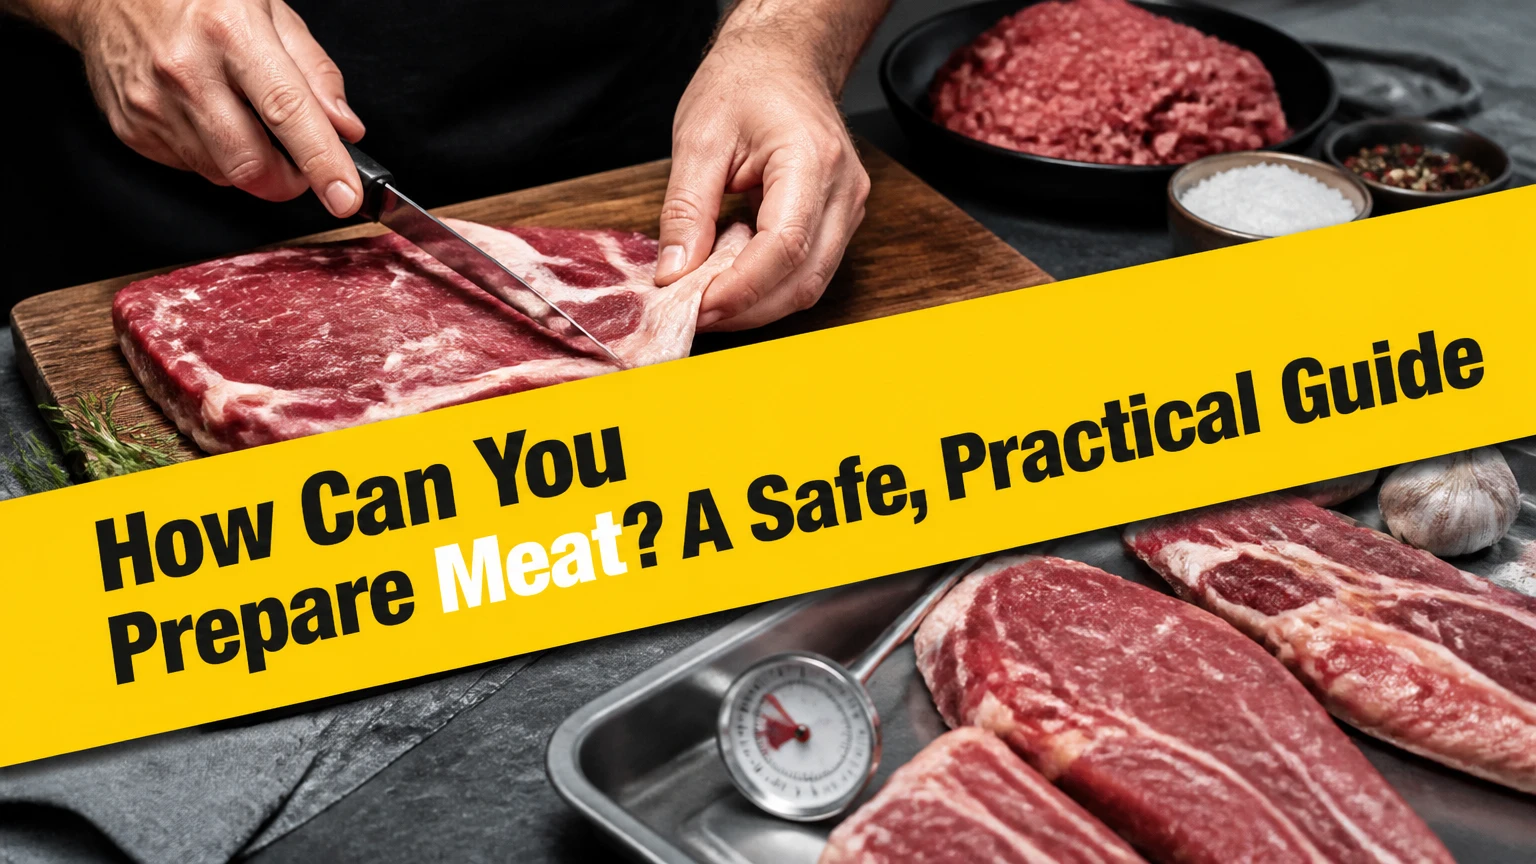
You can prepare meat safely by selecting a method that matches the cut, drying and seasoning the surface, cooking with controlled heat, and checking the thickest part with a thermometer. Tender cuts usually need fast dry heat, while collagen-rich cuts need moist, low heat or prolonged smoking until connective tissue softens.
Key Facts at a Glance
A food thermometer is the most reliable way to verify meat safety; appearance alone cannot confirm doneness.
Whole beef, lamb, and veal cuts commonly reach 63°C (145°F) with a 3-minute rest under United States Department of Agriculture guidance.
Ground meat requires 71°C (160°F), while poultry requires 74°C (165°F).
Dry surfaces brown faster because surface water must evaporate before the Maillard reaction can develop.
Tough cuts become tender through time and collagen conversion, not through higher heat alone.
Resting meat for 5-20 minutes, depending on size, improves slicing and reduces juice loss.
How Can You Prepare Meat Safely?
Safe meat preparation has four controls: prevent cross-contamination, control time and temperature, verify the internal temperature, and refrigerate leftovers promptly. Keep raw meat refrigerated at 4°C (40°F) or below, wash hands after handling it, and use separate boards or thoroughly clean equipment before preparing ready-to-eat food.
The USDA Food Safety and Inspection Service states, “The only way to know whether food is safely cooked is to use a food thermometer.” Insert the probe into the thickest section, avoiding bone, fat pockets, and the pan. For thin pieces, insert the thermometer from the side so the sensing tip reaches the center.
Raw meat should not sit unrefrigerated for more than 2 hours, or more than 1 hour when ambient temperature exceeds 32°C (90°F). Refrigerate cooked meat in shallow containers within those limits. These controls matter more than whether a steak looks brown or a chicken breast appears white.
Before You Start
| Requirement | Typical specification | Why it matters | Low-cost alternative |
|---|---|---|---|
| Instant-read thermometer | $10-$30, -50°C to 300°C range | Confirms the center is safe | Dial thermometer, if calibrated |
| Heavy skillet | 25-30 cm diameter | Holds heat for browning | Thick stainless-steel pan |
| Cutting board | 30 x 40 cm minimum | Separates raw and cooked work | Two washable boards |
| Cooking fat | 1-2 teaspoons per 225 g meat | Transfers heat and limits sticking | High-heat neutral oil |
| Tongs | 25-30 cm length | Turns meat without piercing it | Wide spatula for thin pieces |
| Paper towels | 2-4 sheets per portion | Removes surface moisture | Clean, washable kitchen towel |
What Happens When Meat Is Heated?
Heat unfolds muscle proteins, then causes those proteins to bond and contract. Moderate heating changes texture and color; excessive heating squeezes out more water, which makes lean meat dry and firm.
Myoglobin, the pigment associated with red meat color, changes with temperature and oxygen exposure. A brown exterior does not prove that the center is safe, and pink color does not automatically prove that meat is undercooked. Temperature measurement is the decisive check.
Collagen behaves differently from muscle protein. In cuts such as chuck, brisket, shank, and shoulder, prolonged cooking in a moist environment converts collagen into gelatin, often at an internal range near 90-96°C (194-205°F), although tenderness varies by cut and structure. A tough braise usually needs more time, not a hotter burner.
The Maillard reaction creates roasted aromas and browned crust when a relatively dry surface reaches roughly 140°C (284°F) or higher. A wet steak first steams, so drying the surface and avoiding a crowded pan directly improves browning.
How Do You Prepare Meat Step by Step?
The following process works for steaks, chops, poultry portions, roasts, and braising pieces. Total active preparation typically takes 10-20 minutes, while cooking ranges from 10 minutes for thin portions to 6 hours for large tough cuts.
Step 1: Match the Cut to the Cooking Method
Choose fast, dry heat for naturally tender cuts and slow, moist heat for cuts containing abundant connective tissue. Ribeye, strip steak, tenderloin, loin portions, and boneless poultry breasts generally suit searing, grilling, broiling, or roasting; chuck, brisket, shank, and shoulder perform better with braising, stewing, or smoking.
Thickness also changes the method. A 2.5 cm steak can sear directly, while a 5 cm steak benefits from gentle oven cooking followed by a short sear.
Success checkpoint: The cut has a method selected according to tenderness, thickness, fat content, and available time.
Common mistake: Treating every cut like a steak. Long, hot cooking makes lean tender cuts dry, while short cooking leaves collagen-rich cuts chewy.
Step 2: Trim, Dry, and Season
Remove loose connective tissue, dangling fat, and ragged edges, but retain an even fat cap when it protects a roast or adds flavor. Pat the exterior dry, then season with salt and any dry spices suited to the dish.
For a 225 g portion, a typical starting point is 2-3 g of salt, adjusted for the saltiness of sauces or spice blends. Salt 40 minutes to overnight ahead when practical; if cooking immediately, season just before the meat enters the pan to reduce surface moisture.
Do not rinse raw meat. Rinsing spreads bacteria through sink water and nearby surfaces without making the meat safer.
Success checkpoint: The surface feels dry, seasoning is distributed evenly, and no raw juices have contacted ready-to-eat ingredients.
Common mistake: Applying a wet marinade immediately before searing. Drain the meat and blot it first, or the liquid will delay browning.
Step 3: Brown the Meat
Preheat the skillet over medium-high heat until a drop of water evaporates quickly, then add 1-2 teaspoons of cooking fat. Place the meat in a single layer and leave space around each piece.
For a 2.5 cm steak, sear approximately 2-4 minutes per side, then reduce heat or transfer the steak to a moderate oven if the center needs more cooking. Thin cutlets may need only 2-3 minutes total. Turn when the first side releases easily and has a deep brown crust.
Browning is a flavor step, not a safety guarantee. After searing, continue cooking until the center reaches the appropriate target temperature.
Success checkpoint: The surface is evenly browned, the pan is not releasing large amounts of liquid, and the fat is hot but not burning.
Common mistake: Moving the meat repeatedly. Frequent movement scrapes away developing crust and lowers contact heat.
Step 4: Finish With the Right Heat
Use direct dry heat for tender portions and indirect or enclosed heat for thick pieces. A grill should have a hot zone and a cooler zone, allowing the exterior to brown without burning before the center cooks.
For roasting, use a preheated oven and place the thermometer probe in the thickest section. A large roast may continue rising 3-6°C (5-10°F) after removal, so account for carryover cooking without guessing below the food-safety target.
For poultry, check the thickest breast and the innermost thigh area. Bones can conduct heat unevenly, so take more than one reading when the shape is irregular.
Success checkpoint: The thickest section reaches the target temperature, and the thermometer reading is stable after repositioning the probe.
Common mistake: Checking only the thinnest edge. The edge cooks first and can give a falsely reassuring reading.
Step 5: Cook Tough Cuts Slowly
Brown tough meat first, add enough liquid to reach roughly one-third to one-half of its height for braising, cover the pot, and maintain a gentle simmer. A typical braise takes 2-4 hours at approximately 150-165°C (300-330°F) in the oven, while small stew pieces often take 1.5-3 hours.
A rolling boil can break meat fibers and evaporate liquid too quickly. Keep the liquid just active enough to produce occasional bubbles. Test tenderness with a fork or skewer rather than relying on time alone.
For smoking, maintain a stable chamber temperature commonly between 107°C and 135°C (225-275°F). Clean, thin smoke produces a better flavor than dense white smoke, which often indicates incomplete combustion.
Success checkpoint: A skewer enters with little resistance, and the meat separates without feeling rubbery.
Common mistake: Removing a braise when the meat has reached a high temperature but remains tough. Collagen conversion takes time, and temperature alone does not prove tenderness.
Step 6: Rest, Slice, and Serve
Rest small steaks and chops for about 5 minutes, medium roasts for 10-15 minutes, and large roasts for 15-20 minutes. Rest poultry portions for 5-10 minutes so heat and moisture redistribute before cutting.
Slice across the visible grain, especially for flank, skirt, brisket, and other strongly fibrous cuts. Cutting perpendicular to muscle fibers shortens the fibers that the diner must chew.
Use a sharp knife and make clean strokes rather than sawing. Save collected juices for a sauce or gravy.
Success checkpoint: Slices hold together, show an even interior, and release only a small amount of juice onto the board.
Common mistake: Wrapping meat tightly during a short rest. Trapped steam softens a crisp crust; use loose foil only when heat retention matters more than surface texture.
Which Method Fits Each Cut?
The best cooking method depends mainly on connective tissue, thickness, fat distribution, and the desired surface texture. Fast dry heat suits tender cuts, while slow wet or smoky heat suits collagen-rich cuts.
| Cut or food | Recommended method | Typical cooking time | Main control point |
|---|---|---|---|
| Ribeye steak, 2.5 cm | Pan-sear or grill | 6-10 minutes | Sear surface, then check center |
| Beef tenderloin roast, 1 kg | Roast and rest | 35-55 minutes | Probe the middle |
| Beef chuck, 1.5 kg | Braise | 3-4 hours | Bare simmer and fork tenderness |
| Lamb shank, 450 g each | Braise | 2.5-3.5 hours | Liquid level and covered pot |
| Chicken breast, 200 g | Sear, roast, or grill | 12-20 minutes | Stop at 74°C (165°F) |
| Chicken thigh, 200 g | Roast or braise | 25-45 minutes | Check near the bone |
| Ground beef patty, 150 g | Pan-cook or grill | 8-12 minutes | Center at 71°C (160°F) |
| Brisket, 2-4 kg | Smoke or braise | 6-12 hours | Tenderness, not clock time |
Dry Heat or Wet Heat?
Dry heat creates browning and concentrated roasted flavor, while wet heat softens connective tissue and produces sauce. Pan-searing, grilling, broiling, roasting, and smoking are dry or predominantly dry methods; braising and stewing use liquid to transfer heat and hydrate the cooking environment.
| Method | Best cut category | Typical temperature or setting | Typical duration |
|---|---|---|---|
| Pan-searing | Steaks, chops, cutlets | Medium-high pan, about 200-230°C surface | 6-10 minutes |
| Grilling | Steaks, kebab pieces, poultry | Direct zone, 230-290°C chamber | 8-20 minutes |
| Roasting | Whole poultry, roasts | 160-220°C oven | 30 minutes-4 hours |
| Braising | Chuck, shank, shoulder | 150-165°C oven, gentle simmer | 2-4 hours |
| Stewing | Cubed, collagen-rich meat | 85-96°C liquid | 1.5-3 hours |
| Smoking | Brisket, ribs, shoulder | 107-135°C chamber | 4-16 hours |
What Internal Temperature Should Meat Reach?
The following United States Department of Agriculture targets apply to common household cooking. Measure the thickest portion and follow any local food-safety rules that are stricter than these values.
| Food | Minimum internal temperature | Rest or holding requirement | Thermometer location |
|---|---|---|---|
| Beef, lamb, or veal steaks and roasts | 63°C (145°F) | Rest 3 minutes | Thickest central area |
| Ground beef, lamb, or veal | 71°C (160°F) | No additional rest required | Center of patty or loaf |
| Poultry, including chicken and turkey | 74°C (165°F) | No additional rest required | Breast and inner thigh |
| Ground poultry | 74°C (165°F) | No additional rest required | Center of the thickest section |
| Reheated cooked meat | 74°C (165°F) | Serve promptly | Several spots if quantity is large |
| Slow-cooked shredded meat | Usually 90-96°C (194-205°F) | Rest 15-30 minutes | Thickest section, then test texture |
Rare and medium-rare targets are culinary preferences, not universal safety guarantees. Whole intact beef or lamb may be served below 63°C (145°F) in some culinary settings, but vulnerable people, including young children, older adults, pregnant people, and immunocompromised diners, should follow conservative food-safety targets.
How Long Does Meat Take to Cook?
Cooking time depends more on thickness and starting temperature than on weight alone. A thin 150 g cutlet can finish before a thicker 250 g steak, while a compact roast may need an hour or more despite weighing less than a broad, thin piece.
| Food and thickness | Heat method | Typical time | Expected result check |
|---|---|---|---|
| Steak, 2 cm | Hot skillet | 5-8 minutes | Center temperature |
| Steak, 4-5 cm | Reverse-sear | 35-60 minutes | Gentle oven finish, then sear |
| Chicken breast, 2-3 cm | 200°C oven | 18-25 minutes | 74°C (165°F) center |
| Chicken thighs, bone-in | 200°C oven | 35-50 minutes | 74°C (165°F), tender near bone |
| Meatballs, 4 cm | Simmer or bake | 20-30 minutes | 71°C (160°F) center |
| Beef chuck cubes, 4 cm | Covered stew | 1.5-3 hours | Fork slides in easily |
| Whole chicken, 1.5 kg | 190°C oven | 65-90 minutes | Breast and thigh readings |
Use the clock to plan, not to declare doneness. Meat thickness, pan material, bone placement, oven accuracy, and whether the food began chilled can shift the finishing time substantially.
How Can You Prepare Meat With Limited Equipment?
A skillet, oven-safe dish, tongs, knife, board, and instant-read thermometer can handle most home preparations. A heavy skillet can sear steaks, brown stew meat, cook ground meat, and finish poultry in an oven without specialized equipment.
A slow cooker is useful for hands-off braises, but browning meat first improves flavor and reduces the gray, steamed exterior associated with adding raw meat directly. A grill offers smoke and char but needs a cooler zone for thick cuts. Sous vide offers precise doneness but still requires a hot finishing surface for browning.
| Equipment | Typical purchase range | Strongest use | Limitation |
|---|---|---|---|
| Instant-read thermometer | $10-$30 | Safety and doneness | Requires correct probe placement |
| Cast-iron skillet | $25-$70 | Searing and oven finishing | Heavy and slower to cool |
| Dutch oven | $60-$250 | Braising and stewing | Takes 2-4 hours for full results |
| Slow cooker | $35-$150 | Hands-off tough cuts | Weak surface browning |
| Sous vide circulator | $80-$250 | Precise thick-cut cooking | Bag and searing steps remain necessary |
| Charcoal or gas grill | $100-$800 | Grilling and smoking | Weather and temperature management |
Sous vide is not ideal for large batches without enough water circulation, and it does not create a browned crust by itself. Smoking is also a poor choice when dinner must be ready in under an hour.
How Should You Handle Frozen Meat?
Thaw meat in a refrigerator, in cold water changed every 30 minutes, or in a microwave followed by immediate cooking. Refrigerator thawing gives the most even texture and usually requires overnight time for thick portions.
Cooking from frozen is possible for some oven, pressure-cooker, and packaged preparations, but it increases the cooking time and makes surface browning harder. Never thaw meat on a countertop, where the exterior can enter the bacterial growth range while the center remains frozen.
How Should You Cool and Store Meat?
Refrigerate cooked meat within 2 hours, divide large quantities into shallow containers, and use refrigerated leftovers within 3-4 days. Freeze portions in airtight packaging when they will not be eaten during that window.
Reheat leftovers to 74°C (165°F), adding a little stock, water, or sauce when the meat is lean. Repeated reheating increases moisture loss, so warm only the portion needed for the meal.
Why Is Meat Tough, Dry, or Pale?
Tough meat usually results from either insufficient collagen conversion or overcooked muscle fibers. Collagen-rich cuts need more time at gentle heat, while lean tender cuts need shorter cooking and careful temperature control.
| Problem | Likely cause | Immediate fix | Prevention |
|---|---|---|---|
| Tough braise | Cooking stopped too early | Cover and continue 30-minute checks | Cook until fork-tender |
| Dry chicken breast | Center exceeded 74°C (165°F) for too long | Slice and add sauce or broth | Use thermometer early |
| Pale steak | Wet surface or crowded pan | Drain, dry, and resear in batches | Leave 2-3 cm between pieces |
| Burned exterior, raw center | Heat too intense for thickness | Finish in a 150-175°C oven | Use a two-zone grill or reverse-sear |
| Gray, watery stew | Boiling or overcrowding | Reduce uncovered after tenderness | Maintain a gentle simmer |
| Chewy slices | Cut with the grain | Slice thinly across fibers | Identify grain before cutting |
A reverse-sear is particularly effective for thick steaks because gentle oven heating reduces the gap between exterior and center temperatures, after which a brief high-heat sear develops the crust.
An important limitation: marinades mainly flavor the surface and may soften only a shallow layer. Acidic marinades do not transform a collagen-rich roast into a tender steak; the cut still needs an appropriate cooking method.
How Can You Prepare Meat for Different Situations?
For a beginner: Use boneless chicken thighs or a 2.5 cm steak in a skillet. Dry the surface, season, cook in a single layer, and begin checking temperature before the expected finish.
For a fast dinner: Choose thin cutlets, ground meat, or steaks under 3 cm thick. These portions usually finish in 10-20 minutes, including preheating.
For a tough roast: Brown the meat, add aromatics and liquid, cover tightly, and cook at 150-165°C until a skewer meets little resistance. Plan 3-4 hours rather than relying on a fixed internal temperature.
For a grill without a lid: Use thinner portions and turn frequently enough to prevent scorching. Thick roasts need an enclosed oven, covered grill, or indirect heat zone.
For meal preparation: Cook a large braise, cool it in shallow containers, refrigerate within 2 hours, and portion it before freezing. Label each package with the date and reheating instructions.
Common Questions About Preparing Meat
Should meat rest at room temperature before cooking?
A short 15-20 minute period can reduce surface chill for a thin portion, but leaving meat out is not required and does not reliably bring the center to room temperature. Keep meat refrigerated until preparation, especially in a warm kitchen, and use a thermometer to manage uneven cooking.
Should you wash raw meat before cooking?
No. Washing raw meat can spread bacteria through sink water and surrounding surfaces. Cooking meat to the appropriate internal temperature destroys the relevant pathogens more reliably than rinsing.
How do you know when meat is done without a thermometer?
Color, firmness, and clear juices provide clues but cannot reliably verify safety. A thermometer is especially important for poultry, ground meat, thick roasts, and irregular pieces because the exterior can look finished while the center remains below the safe target.
Is marinating meat necessary?
Marinating is optional. Salt improves seasoning, while oil carries aromatic compounds and acidic ingredients affect the surface; neither replaces correct heat control or makes unsafe meat safe. Pat marinated meat dry before searing to restore browning.
Why does meat release liquid in the pan?
Liquid appears when the pan is overcrowded, the surface is wet, the meat is frozen or very cold, or the heat is too low. Cook in batches, dry the portions, and allow the pan to recover heat between additions.
Can you prepare meat in advance?
Yes. Cooked meat can be refrigerated for 3-4 days or frozen in airtight portions. Cool large quantities quickly in shallow containers, then reheat the needed portion to 74°C (165°F) rather than repeatedly warming the entire batch.
The Bottom Line
To prepare meat well, match the cut to the heat: sear, grill, or roast tender portions, and braise, stew, or smoke collagen-rich cuts. Dry the surface, avoid overcrowding, measure the thickest section with a thermometer, rest the cooked meat, and slice across the grain. The best answer to “how can you prepare meat” is a controlled method built around cut, thickness, temperature, and time.